A portrait with the eyes in focus is much more impactful than a randomly looking image. It seems more appealing as “the eyes are the window to the soul”. Unfortunately, not every photo becomes perfect with proper focus in the eyes. Haven’t you ever found in your pictures that your eyes are looking in a different direction than you intended? If so, you might have searched for how to move eyes in Photoshop or using online tools.
In fact, most e-commerce and commercial modeling photos require some photo editing, especially the direction a person is looking. Otherwise, the picture won’t seem captivating and influential to the viewers.
If you intend to create engaging content for social media, magazine covers, or advertisement banners, a focused eye on the person in the right direction matters a lot. However, when you don’t get it in the original photo, you can follow the methods and techniques we will share to change eye direction in Photoshop.
Step-by-Step Guide On How to Move Eyes in Photoshop
While there are many web tools and mobile apps available for photo editing, let’s focus on Adobe Photoshop. It’s considered the most popular image editing software used for graphic design, digital art, and web design.
Steps to change eye direction in Photoshop:
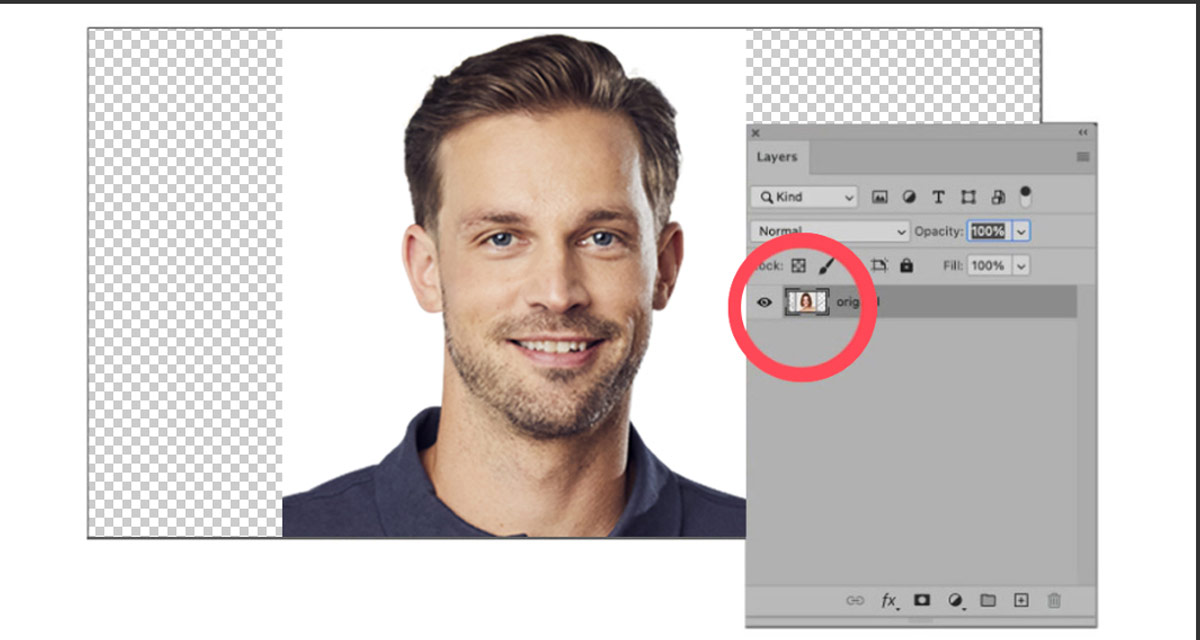
Step 1: Open Your Image
First of all, open your photo in Photoshop. If your photo has different parts or layers, make sure you select the one with the person’s face. In commercial images, there are often many other elements within a frame. So, choose the layer with the entire face.

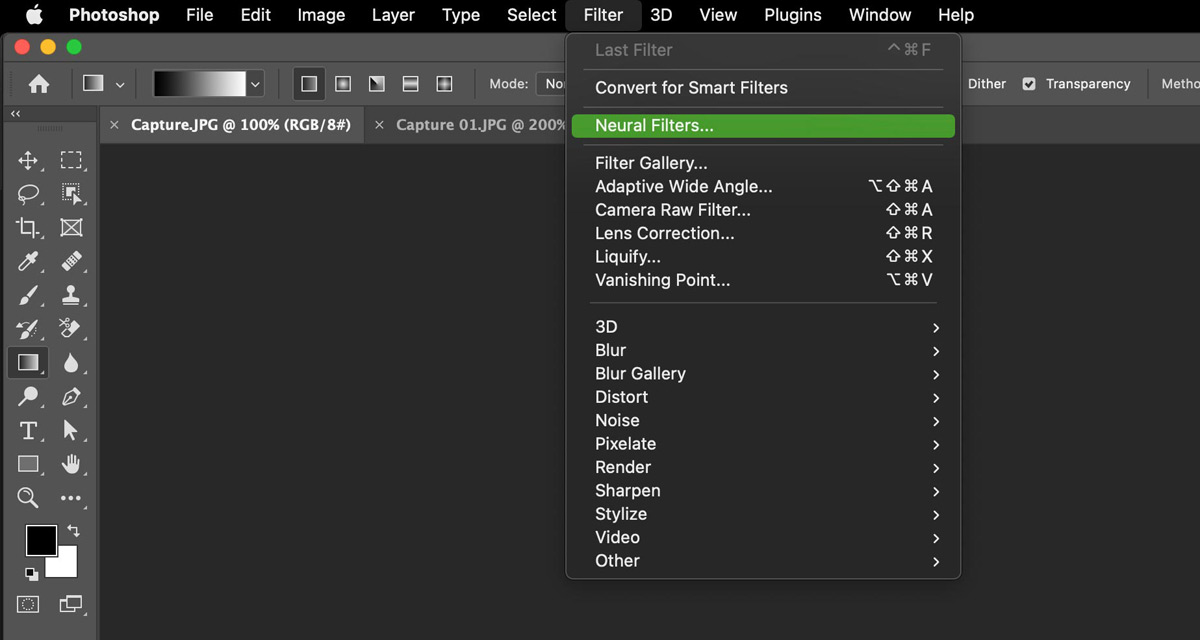
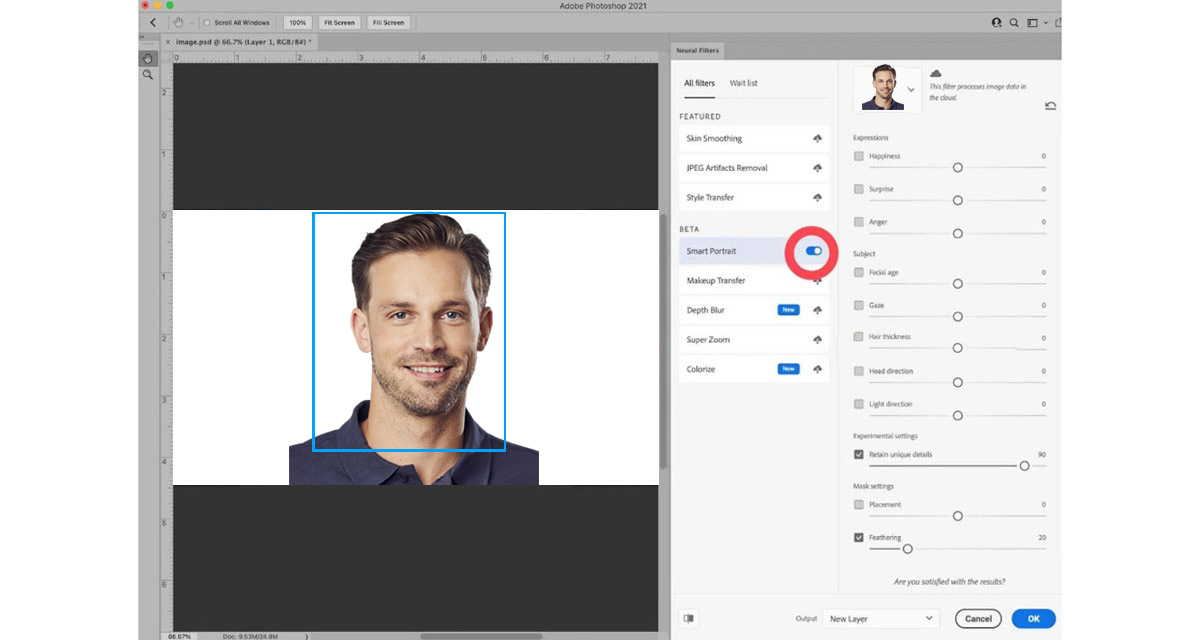
Step 2: Access Neural Filters
From the dropdown menu at the top of the Photoshop window, you’ll find a menu called “Filters.” Click on it, and from there, choose “Neural Filters.”
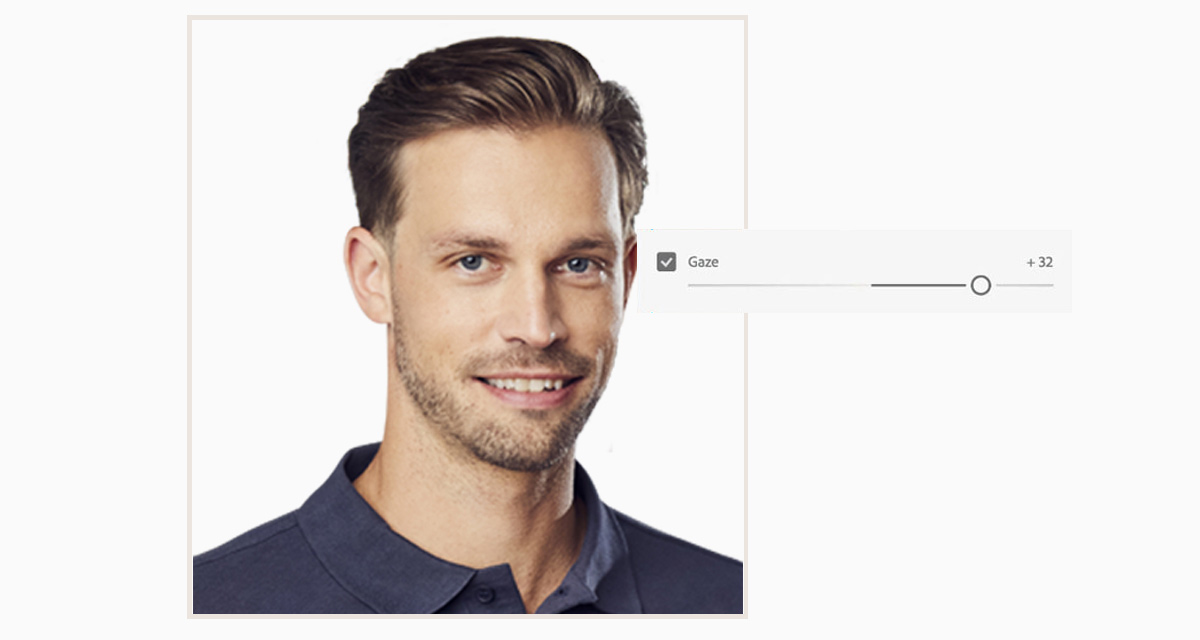
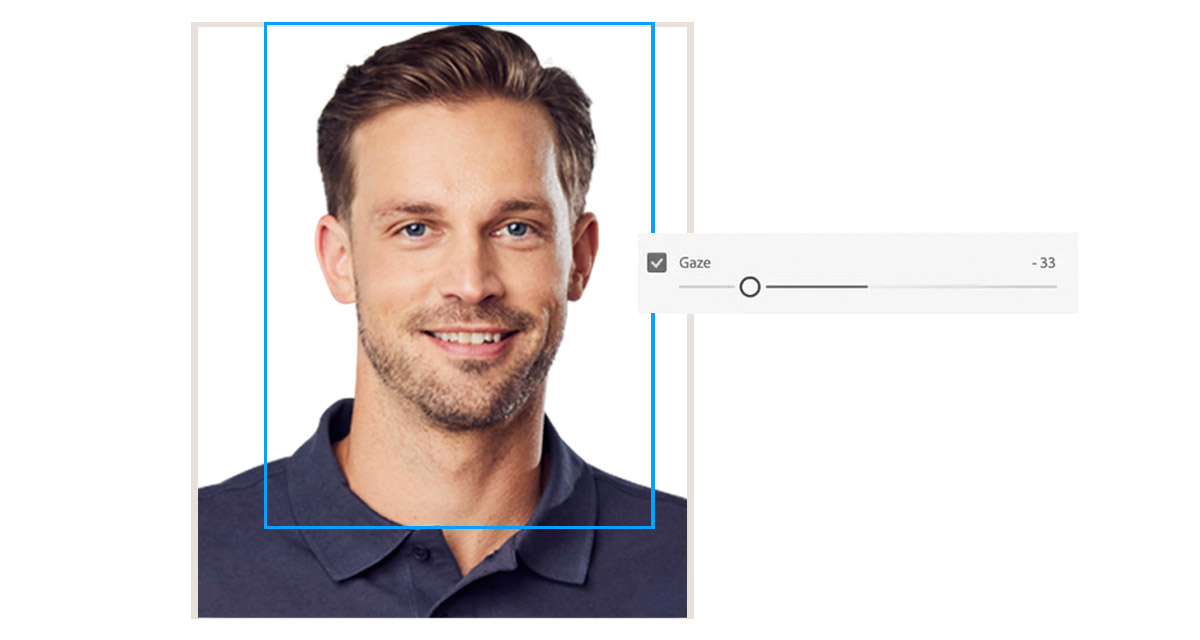
Step 3: Adjust the Gaze
In the Neural Filters window, turn on the feature called “Smart Portrait” and look for an option called “Gaze.” This is where you can make the person’s eyes look to the left or right. But remember, you can’t make them look up or down using this tool. It means moving the toggle right will move the model’s eye to the right, similarly for the left. In this example, we moved the person’s eye to the right.
Step 4: Adjust the Head Direction if Required to Make it Natural
Now, changing the eye direction might sometimes make the entire image look a little unnatural and edited. To make it look natural, you can use another option called “Head Direction” below “Gaze” to move the model’s head right or left. Like the “Gaze”, move the toggle right or left according to your photo. Please don’t move it too much so that it makes the image more unrealistic.
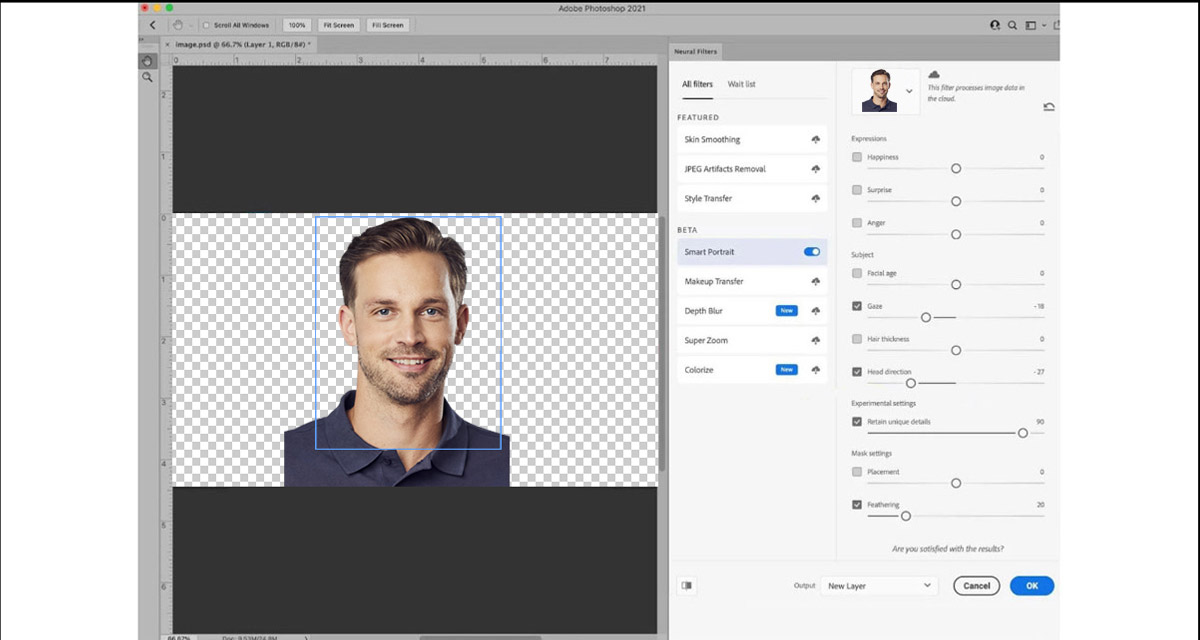
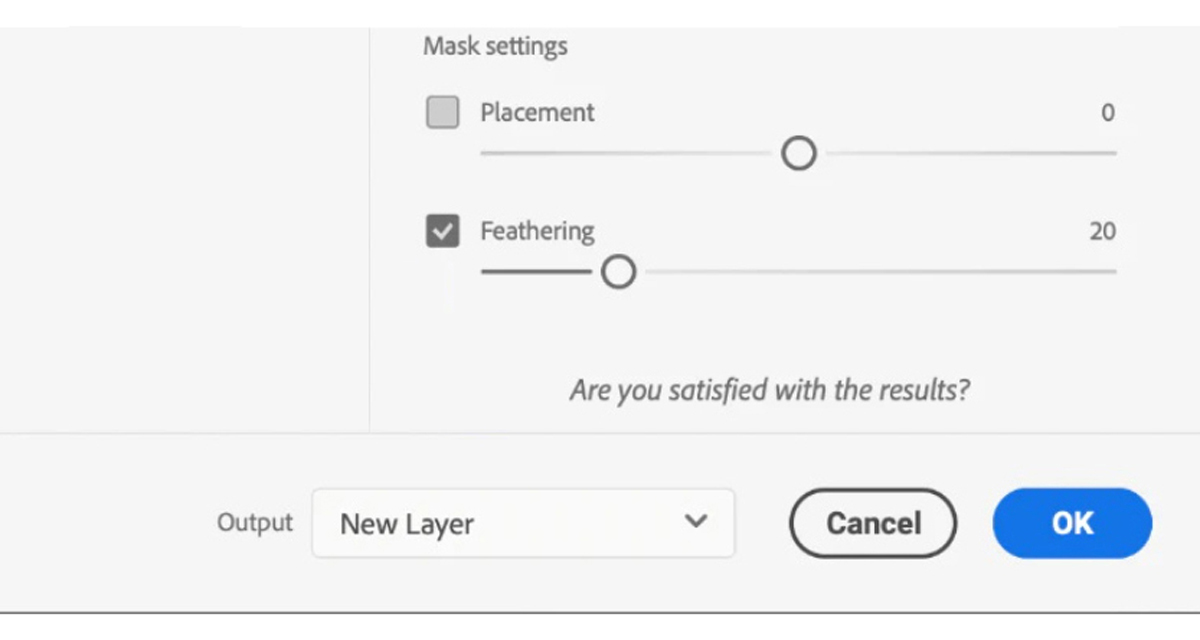
Step 5: Apply the Changes
Once you’ve made the adjustments naturally go to the bottom of the Neural Filters window. There, you’ll see an option called “Output”. Set it to “New Layer” and then click “OK.”Since you now know how to move eyes in Photoshop, we hope you can now change your gaze in a photo by yourself.
Does Eye Gaze Really Matter in a Photo?
For a beautiful portrait, of course, body parts and postures are essential. But the most crucial part is the subject’s eye to grab attention. There is a saying, “the eyes shout what the lips fear to say”. That being said, let’s get to know some key factors of how eye gaze affects your photo:
Connectivity
A portrait photo with the correct eye gaze helps to engage and communicate with its viewers as it conveys the entire idea to the viewer.
Drive the Audiences’ Gaze
The person looking at a photograph will usually look in the same direction that the subject is looking in.
Helps to Show Something Important
If you use pictures of people on your website, make sure they’re looking at something you want your visitors to look at as well. It will grab the visitors’ look to your intended element. It can be a product, ad, or promo video.
So, eye gaze adds depth and helps create a connection with the audience. They can draw the viewer into something and tell a story.
How Overnight Graphics Can Help You with Eye Gaze Movement
Overnight Graphics is a professional graphic design and image editing service, helping businesses and individuals with designing and editing needs. At Overnight Graphics, we have highly skilled designers who are experts in various services. The services include photo retouching, correcting skin color, shadow making, making eyes brighter, moving eyes, and so many others. Visit overnightgraphics.com to check out all our services. You can also request a free trial of your desired service using the “Get a Quote” menu on our website.
Frequently Asked Questions (FAQ)
Q: Why is eye gaze important in a picture?
A: As we mentioned earlier, eye gaze significantly impacts the photo, which talks about the person’s lips in the picture. In fact, the person’s eye gaze drives the viewer’s gaze to something you want them to see.
Q: Can I change my eye gaze in Photoshop?
A: Yes, Adobe Photoshop is the best tool for changing and moving the eye direction of a person. You can do the task in Photoshop most effectively compared to other software and tools online.
Q: How long does it take to change eye direction in a photo with Photoshop?
A: The time required depends on the changes needed in the photo and your proficiency with Photoshop. It can range from a few minutes for simple adjustments to longer for more complex images.
Q: Are there other online tools to change eye direction?
A: There are many other online tools and mobile apps to change the eye direction of a person. However, from our expert opinion, you can never do it as perfectly as you can do it in Photoshop.
Q: Can I get help from Overnight Graphics to change eye direction?
A: Absolutely, Overnight Graphics offers a wide range of services related to image editing.
Visit the website and use the Get a Quote page with your particular requirements, or email us at contact@overnightgraphics.com for any requirements like background removal, retouching, color correction, and changing eye gaze.
Q: How can I have trial work done from Overnight Graphics?
You can visit Overnight Graphics and use the Get a Quote page. There, you will find a form to complete with your details, attach a picture and write your specific requirements to be done. Then click on the “Get Free Trial” button.
You’ll then get the edited image within 24 hours and check it to meet your demand. After a successful trial work, you can contact Overnight Graphics for any large-volume orders
Conclusion
Editing your photos is essential, especially when it comes to the eyes. Changing eye direction in Photoshop is a simple way to make your photos look more natural and engaging.
If you ever find it challenging to do this on your own or don’t know how to move eyes in Photoshop, remember that Overnight Graphics is here to help with all your image editing needs. Please send us an email at contact@overnightgraphics.com for expert assistance.